
Research
and Compliance Mode note:
In RUO mode, all users can create and edit databases.
In Compliance mode, databases can only be created and edited by ModFitAdmins
and ModFitEditors.
This section introduces the concepts and functions of ModFit LT's database features. It is more of a discussion than a tutorial, however there are examples to clarify some aspects of the system.
ModFit LT has a simple, powerful database engine that allows you to store large amounts of data easily in one or more database files. You can view databases from within the program, manually add, delete, and replace records, and select the fields you want to store in each database. The databases are created in a simple, text format known as tab-delimited text, which can be read by common database and spreadsheet programs. These features give you a great deal of flexibility in choosing what information to store, where to store it, and how to integrate the information into other database and information systems.
When you create a new project in ModFit LT, the program automatically creates a database file for the project.
How do you create a database?
It is best to run an analysis of a data file before you create or edit a database. Open one of your data files and perform an Auto-Analysis. This will fill the program with the information you can choose to store in your database. You can set up a separate database for each kind of analysis you do, one database for everything you do with the program, or anything in between.
The fastest way to create a database from your results is to use the Database Wizard, found on the Edit tab of the ribbon.

The wizard helps you to select a database (or create a new one) and it adds fields for all of the results that are shown on the current report. This is by far the fastest and easiest way to set up a database.
If you want to select additional fields or have greater control over the database structure, you can click the Databases on the Edit tab of the ribbon. The Edit All Databases dialog will display.
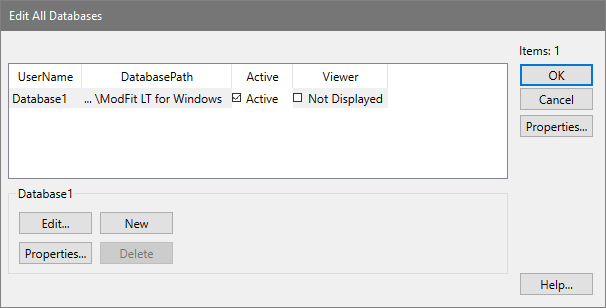
There is one database created by the program automatically. This database will not store anything until you tell the program what information you want to save in the database. To do so, you need to select the database in the list and click the Edit button. You can also double-click the item in the list to do this.
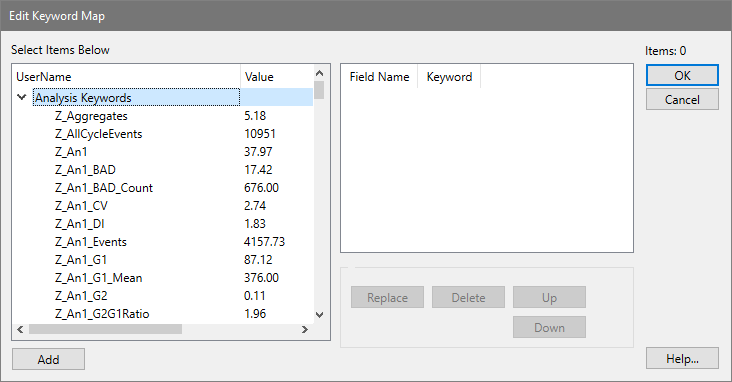
The Edit Keyword Map dialog is displayed. The left side of this dialog presents the information available to store, and the database fields are shown on the right. Initially, the right-hand list is empty.
What can you store in the database?
ModFit LT allows you to database virtually any statistic it generates, as well as keyword information from the files that you analyze. The tree on the left of the dialog can be expanded to display branches of keywords. To open or close a branch of the tree, double click the label or click the arrow next to the label. Each branch of the tree contains a set of related keywords.
To add an item to your database definition, select it in the tree on the left and click the Add button. A field will be appended to the database. You can also select more than one Keyword at a time and click Add to create multiple fields at once.
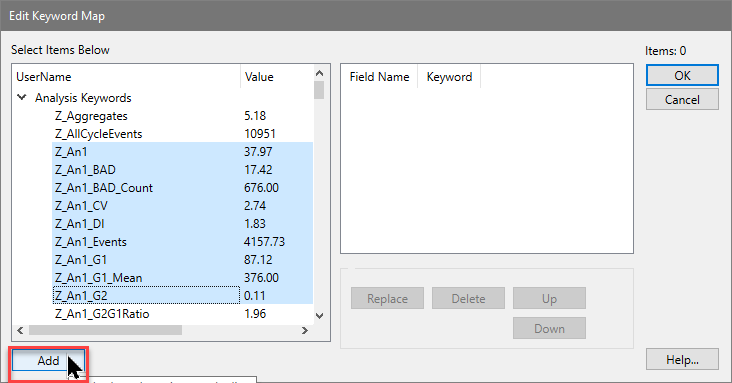
The field names initially assigned when you click the Add button are based on the keyword added.
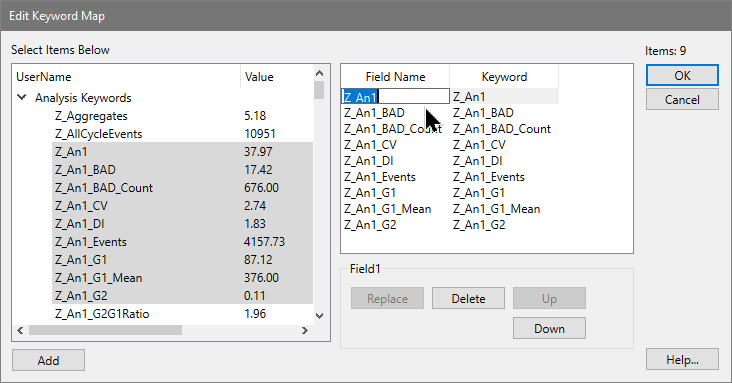
You can edit the names for the fields after they are added to the list, if you wish. To do so, click once on the field name to select it, then after a brief pause, click slowly again. An edit control will appear around the field name, allowing you to type a new name for the field. You can also use the Tab key to move from one field to the next if you need to edit the names of several fields.
To remove one or more fields from the database, select the fields in the list and click the Delete button.
To replace an existing field with a new keyword, select the new field in the Keywords list and the one to replace in the list. Then, click the Replace button. The name of the field will not change, only the keyword used to evaluate the field.
To change the order of fields in the database, select one or more fields in the list and then use the Up and Down buttons to move the fields.
When you have finished selecting information to store in the database, click the OK button to close the Edit Keyword Map dialog.
What files are created?
When you create a project in ModFit LT, there is a database created automatically for the project. It is located in the Database folder of the project, and the project it typically created in the user's Documents\ModFit LT\Projects folder.
You can also create databases outside of a particular project. This are stored in the location shown in the table below. You can choose another location, as long as you have read/write permissions to that folder.
Operating System |
Default Location |
Windows |
C:\Users\[user name]\Documents\ModFit LT for Windows |
MacOS |
[user name]/Documents/ModFit LT for Mac |
A file is created to store a "map" of keywords to database fields. The map file name uses the name of the database object and appends ".map" to it. For "Database1", the map file is named "Database1.map".
Next, the program creates the actual database file. This is the tab-delimited, ASCII text file that you may open in other database or spreadsheet programs. The database file name uses the database object name and appends ".txt" to it. This file is readable in virtually any program that can open unformatted text. The first line of the file contains the names of the fields separated by tabs; it is known as the database header or definition. Each subsequent line contains a record of information.
If the database had been created previously, ModFit LT will automatically create a backup of the database before overwriting the existing one. The backup file will have the same name as the database, with "backup" appended to it.
Finally, the program creates a text file called a "key" file. This is a text file that explains the database and mapping files. You can open this file in a text editor to review the structure of the database you have created. Its name is based on the database object name, with "key.txt" appended to it.
How do you activate the database?
Once a database has been defined, there are several additional properties you can specify. These properties determine whether the database is active, whether it will prompt you before saving a record, whether or not you want to see the records in a database viewer, and where you want to store the database.
To edit these properties for a database, select the database in the Edit All Databases dialog box and click the Properties button at the bottom of the dialog. The Edit Properties for Database dialog will be displayed.
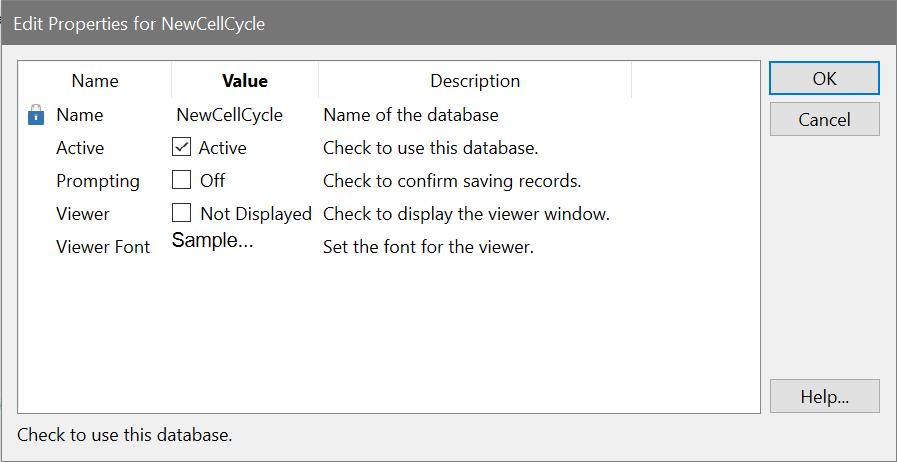
The properties are enabled or disabled with simple check boxes. If you create a database outside of a project, there are several additional actions in this dialog. You can use the Choose button to use an existing database that you have defined previously. You can change the location of the database using the Path button.
In order to store records of information in a database, it must be "active". To make a database active, check the Active checkbox in the Edit Properties dialog. Database records are saved after Automatic Analysis or Execute Model commands are performed. Additionally, you can save a record at any time by clicking the "+" button on the database viewer.
If the Prompting checkbox is checked, ModFit LT will display a message each time it is about to save a record to the database. You can choose at that time whether or not you want to save the record. If Prompting is disabled, the database will save a record without prompting.
To view the database while you work with ModFit LT, check the Viewer checkbox. A database viewer window will be created and displayed. The database viewer can be moved, resized, and scrolled horizontally or vertically. It has a toolbar that provides some additional manual database functions. See the topic Database Viewer for more information.
The size of the font used for the database viewer can be set with the Viewer font property.
To select an existing database on disk, click the Choose button. A file selection dialog box will appear, allowing you to navigate to the existing database and select it. Linking to an existing database will rename the database in memory to match the one selected on disk, and the associated database map on disk will be loaded as well.
To change the location of a database, click the Path button. A path navigation dialog will appear. Navigate to the new location.
How do you rename or create additional databases?
To rename a database, display the Edit All Database dialog box by selecting Edit Databases from the Edit menu. Select the database you want to rename and click Properties. You can then edit the name for the database. Note, you cannot edit the name of a project database.
If a file with the new name already exists, you will be given a chance to overwrite the existing file, use the existing file, or cancel the operation.
When you want to create an additional database, click the New button. This will create an empty database with a new name.
Each database has its own map of keywords to fields, and its properties determine whether it is active, prompting, and showing a viewer.
Errors with databases
Since the database system involves creating and manipulating files on disk, there are conditions where errors can occur. If, for example, one of the critical database files is moved or deleted, the program will not be able to use the database. When the program runs into a problem like this, it displays a dialog box of choices.
When you see this dialog, it means that the database "txt" file and the "map" file are out-of-sync with one another. They may have a different number of fields, a different order, different fields defined, or one of the files may be missing.
If you choose the first option, Use the database and manually create a new map, the map file is emptied and partially recreated with the fields defined in the database header. In this case, you need to recreate the keyword-to-field "map" using the Edit Keyword Map dialog.
If you choose the second option, Use the map file and DESTROY the database, all records in the database txt file are emptied and a new "header" is written into it to match the database map file.
The third option, Cancel and de-activate the database, leaves the map and the txt files out-of-sync and deactivates the database, allowing you to investigate the problem before any action is taken.
See also: