Most macro commands are equivalent to mouse operations and menu selections you make. They are stored during macro recording. However, there are a few commands that are only available to you from within the Edit Macro dialog box, e.g. ResetMacroLine, Step, and NoStep.
Note: Currently a maximum of 8000 macro lines is supported.
If you record a complex macro and view it with the Edit Macro dialog box, you will be presented with a list of command lines that may at first be unfamiliar. It is the purpose of this section of the manual to explain what these commands do and what their arguments mean and perhaps give you some tips on when to change them. Some commands such as AppMessage and HistMessage have a format that is really only relevant to Windows and are best created by recording. The numbers associated with the commands shown below are the order in which they were implemented and the order they appear in the Macro Command list box. For the purpose of explaining their functionality, we will arrange them into more meaningful groups. The following are the currently supported macro commands for WinList:
|
1 |
SetPath |
[*.*][D:\winlist\] |
|
2 |
SelectFile |
bag101.fcs |
The SetPath command sets the search wild card for current File IO dialog box (e.g. *.*) and sets the pathway to the files of interest (e.g. D:\winlist\). The square brackets are mandatory because they allow WinList to parse the two sections of the command correctly. Also the terminating "\" in the path is required. The SelectFile command generally follows the SetPath command if you are recording a File IO selection. Its argument is simply the file selected. If the file has no suffix a period must be placed after the name (e.g. 100222.).
It's important to realize that WinList uses the same File IO dialog box for several functions (e.g. File Data Source selection, Gate selection, Palette selection, Region selections, etc.); therefore, these commands must be presented to WinList when the File IO box is on the screen. The best way of doing this is to use the record macro option. If you do, you will always be assured that these commands are presented to WinList at the proper time. A useful technique in modifying these macro commands is to insert a Pause command right after the SelectFile command and then delete the SetPath and SelectFile commands. WinList will stop the macro when it reaches the Pause command and then you can manually select the file of interest and then continue on with the macro by pressing the Continue button on the Macro Status dialog box. It's an easy way of making a macro that is file-specific to be more general. There are, however, more powerful ways of doing this with WinList's Batch features.
|
3 |
PushFileButton |
No longer implemented.
|
4 |
PutLBAway |
If you put away the keyword or parameter list box, this command will be recorded. It is usually not necessary because WinList will put it away for you automatically.
|
5 |
HistEntry |
1 1 2 0 64 H_P1_P2 |
This command is important and may be one that you want to later modify so let's go through it in some detail. This command is recorded when you are selecting which histograms to automatically create in a Data Source. The first number indicates the type of histogram (0=single parameter, 1=dual parameter, and 2=three parameter). The next three numbers (e.g. 1 2 0) indicate which parameters are selected. In the example, we have a dual parameter histogram and the X-axis will be parameter 1 and the Y-axis will be parameter 2. The third parameter is not used for dual parameter but is used for three parameter histograms. The next number (e.g. 64) indicates what resolution to use for the histogram. Finally, the ending text is the name of the histogram (e.g. H_P1_P2). After a macro is written, you might want to change the resolutions of some of the histograms. All you need do is to find the HistEntry command that corresponds to the histogram to change and then edit the resolution portion of the command. Another typical change might be to add another histogram. Just insert another HistEntry command and you're done.
The following group of commands activates the designated window in WinList. WinList uses a double naming technique for finding a particular window. Every window has a numeric id as well as a name. We use both methods for finding a particular Window so that your macro has the best chance of finding the appropriate window even if the name of the Window has changed. The id follows the name in the command arguments. Therefore, in all the Activate commands both the name and id are specified. If WinList can't find the id, it then tries to find the window with the designated name.
|
6 |
ActivateHistogram |
[bag101.fcs][1][H_P1_P2][1] |
Activates histogram window id 1 with name H_P1_P2 in data source id 1 named bag101.fcs.
|
7 |
ActivateDataSource |
[bag101.fcs][1] |
Activates the data source window that has an id of 1 or a name of bag101.fcs. The square brackets are required.
|
8 |
ActivateResult |
[R1 H_P1_P2][1] |
Activates the results window that has an id of 1 or a name of R1 H_P1_P2. The square brackets are required.
|
9 |
ActivateMultiGraph |
[MGraph-1][1] |
Activates the MultiGraph window that has an id of 1 or a name of MGraph-1. The square brackets are required.
Whenever a window is sized or moved and macro record is on, one or more of the following macro commands is generated. The format of all the arguments is the same. The first number is the id of the window and the second two numbers are either the position (Move) or size (Size) of the x and y coordinates of the window. The units are in client units which are pixels relative to the upper left-hand corner of the parent window. The Size commands have an additional argument which is 0 if normal sizing is taking place, 1 if the window is becoming an icon, or 2 if the window is maximizing.
|
10 |
SizeHistogram |
1 367 386 0 |
|
11 |
MoveHistogram |
1 346 4 |
|
12 |
SizeDataSource |
1 788 444 0 |
|
13 |
MoveDataSource |
1 0 0 |
|
14 |
SizeResults |
1 112 111 0 |
|
15 |
MoveResults |
1 4 42 |
|
16 |
SizeMultiGraph |
1 459 245 0 |
|
17 |
MoveMultiGraph |
1 295 230 |
|
|
|
|
|
18 |
DialogBox |
Button {FileIO_OK}1 0 0 |
This command is used many times in macros. It enables the macro to set all the types of objects found in dialog boxes. For example, the Button part of the argument tells WinList to press a button. The FileIO_OK is simply descriptive text for you and is not interpreted by WinList. You do however need to have some description and it must be braced with the curly brackets. The next number tells WinList what button to press. The next two fields are not used for buttons but have meanings for other dialog box objects. The different types of objects supported by this command are INTEGER, RADIO BUTTON, CHECK BOX, BUTTON, LIST BOX, MLIST BOX, CLIST BOX, and STRING. It's really not important for you to know all the details for each of these command variants. If you do ever want to modify one, just record a small macro that sets the dialog box the way you want and then examine it.
|
19 |
AppMessage |
CreateFile WM_COMMAND 60 0 |
This is a very common macro command that issues a Windows message to the WinList application. Any selection of a menu item creates this command. The first part of the argument list is a description of the command invoked (e.g. CreateFile). The second argument is a Windows-related parameter that indicates the type of message being sent to Windows and its arguments. The 60, for example, tells Windows that this is menu item 60. We recommend not changing this parameter without first contacting Technical Support.
|
20 |
SetPaletteID |
4 |
This command is relevant only when the Edit Palette dialog box is on the screen. It sets the palette id that can be edited. Currently WinList supports only 16 colors in its default palette.
The next set of macro commands is only relevant to macro processing. Except for the Pause command, all of these macro commands need to be inserted into the set of macro commands either with the Edit Macro dialog box or by a text editor.
|
21 |
Pause |
Choose the appropriate file to open |
When executed, the Pause command temporarily suspends further macro processing and then displays the text for 5 seconds. The macro system will hold in this state until you press the Continue button in the Macro Status dialog box. Typical uses of Pause are to add manual selection capability to a macro or to simply communicate with the user. You can insert Pauses into the macro by either selecting the Pause menu option in the Macro menu or by inserting the Pause command from the Edit Macro dialog box.
|
22 |
Step |
Turns step debugging on |
|
37 |
NoStep |
Turns step debugging off |
The Step and NoStep commands can help you work through complex macros. If you insert a Step command in a macro, the macro will stop after each macro command is executed and will wait for you to press the Continue button in Macro Status. The NoStep command simply turns this stepping mode off. A very powerful feature of the Macro Status dialog box is that in a paused state, you can highlight another macro command; when Continue is pressed the macro will begin running from the selected command. Thus, when you are in Step mode you can pick and choose which commands to execute.
|
27 |
Remark |
The function of this macro command is simply to document the various sections of a macro. The macro processor simply skips this command when it is executing.
|
29 |
ResetMacroLine |
0 |
The ResetMacroLine command is a powerful macro processing command that should be used very carefully. When this command is executed by the macro processor, the argument is used to reset the macro counter. Thus, if a 0 is in the argument, the macro counter is reset to 0 and the macro processor begins executing the macros starting at the beginning. This cycle will repeat indefinitely until you Pause or Abort using the Macro Status dialog box. There is another way for the macro processor to break the infinite cycle set up by ResetMacroLine. If you have recorded the command
19 AppMessage GetNextBatch WM_COMMAND 15 0
by executing the GetNextBatch menu option under File, WinList will set an internal flag if there are no more batch files that need processing. If the macro processor executes the ResetMacroLine and that batch file flag is set, it will continue with the next macro command. This construction enables you to create a very powerful macro system. For example,
19 AppMessage GetNextBatch WM_COMMAND 15 0
... other processing here, analysis, printing, etc.
29 ResetMacroLine 0
... further processing perhaps.
The above lines enable you to open up a series of batch files from the Open Batch Files dialog box and then to run this one macro. The system will analyze all the batch files automatically until there are no more batch files in the queue. The system will then continue through the ResetMacroLine command and do some further processing. This is the method we recommend for automating your listmode processing.
The following group of macro commands controls the creation, movement, sizing, and deletion of all regions in WinList. Because of the complexity of the arguments for these commands, we highly suggest you create them by recording. Only under very special circumstances should you attempt to edit them.
|
23 |
StartRegion |
1/R2/CD4/1/19 |
When a region is being manipulated, this command is issued first. The first argument (e.g. 1) is the type of region being created (0=1P range, 1=2P region, 3=First Quad stat, 4=2nd,3rd, and 4th Quad stat). The next argument is the name of the region (e.g. R2). The next argument is the region's alias (see Region List, e.g. CD4). The next argument is the region's numeric index (e.g. 1) and the last argument is the number of points that will be in the region (e.g. 19). If there is already a region defined (e.g. R2), it will be erased from the screen and deleted from memory.
|
24 |
AddToRegion |
0/24/51 |
This macro command is issued for each point in the region defined in the StartRegion macro command. The first argument (e.g. 0) is the 0th or first point, the next argument is the x value in the parent histogram channel units (e.g. 24) and the last argument is the y value (51).
|
25 |
ApplyRegion |
1/bag103.fcs/1/H_P1_P2/1 |
This macro command creates and displays the region. The arguments are the region index (e.g. 1), the data source name (e.g. bag103.fcs), the data source id (e.g. 1), the histogram name (e.g. H_P1_P2), and finally the histogram id (e.g. 1).
|
26 |
RegionNameSize |
1/24/55/30/58 |
This command sets the position and size of the region's name. The arguments are the region index (e.g. 1), the left corner (e.g. 24), the bottom left corner (e.g. 55), the right corner (e.g. 30), and the upper right corner (e.g. 58).
The following commands are Windows oriented messages and have rather obscure arguments. It is best that you simply record these and leave it at that. The only argument that may be of importance to you is the descriptive argument. These commands are typically generated when you delete the window using mouse actions.
|
28 |
HistMessage |
HistCommand/273/1/8624 |
|
30 |
ResultsMessage |
DeleteResults/16/0/0 |
|
31 |
DataSourceMessage |
DeleteDataSource/16/0/0 |
|
32 |
MultiGraphMessage |
DeleteMultiGraph/16/0/0 |
|
33 |
InfoMessage |
DeleteInfo/16/0/0 |
|
|
|
|
|
34 |
ScaleHistogram |
1411 |
When a 1P histogram is re-scaled and we are in record mode, this command will be issued. The argument (e.g. 1411) is the new maximum Y-scale for the histogram.
|
35 |
SetPrintArea |
0/0/765/424 |
This command sets the print area for the report printing options of WinList. The arguments are the upper left-hand x-value (e.g. 0) and y-value (e.g. 0) and the lower right-hand X-value (e.g. 765) and Y-value (e.g. 424).
|
36 |
SetSpot |
1/1/416/2/512 |
The SetSpot command sets the current spot to the positions specified in the argument list. The arguments are the histogram type (0=1P, 1=2P; e.g. 1), the parameter number (e.g. 1), the value for this parameter in ADC resolution (e.g. 416), the next parameter number (e.g. 2), and its value (e.g. 512).
|
38 |
ModifyUserCounter |
1,1 |
This command changes the value of one of the user-programmable counters by the amount specified as the argument to the command. The first number in the argument specifies which of five counters to modify (1,2,3,4 or 5), and the second part of the argument specifies the amount to change the counter. The counter can be accessed as an internal keyword [COUNTERn], where n is a number from 1 to 5 identifying which counter you want to access. The [COUNTERn] keyword can be used for naming results windows, MultiGraphs, and any other places where internal keywords are accessible. The counter will be increased by the amount specified if no sign is present; it will be decreased by the amount if the minus sign (-) is specified. For example, ModifiyUserCounter with 1,3 as an argument will increase Counter#1 by 3. Using 3,-2 as an argument will decrease the Counter#3 by 2.
|
39 |
ResetUserCounter |
1 |
This command sets the value of one of five user-programmable counters to zero (0). The argument specifies which counter to reset. The counter can be accessed as an internal keyword [COUNTERn] for naming results windows, MultiGraphs, and any other places where internal keywords are accessible. See also command #38: ModifyUserCounter.
|
40 |
NextBatchItem |
This command tells WinList to process the next available batch item in the list. This command is particularly valuable in creating complex looping commands that involve the RepeatUntil command, (see below).
|
41 |
RepeatUntil |
LL <Keyword><Condition><Value> |
The arguments to the RepeatUntil command are:
LL: is the absolute macro line number,
<Keyword>: is usually either [COUNTERn] (see above), [LEVEL] which returns the level of the current batch item, [NEXTLEVEL] which returns the level of the next batch item, [FINISHBATCH] which returns 1 if the last batch item has been processed, or [NEWLEVEL] which returns 1 if the next batch item level is different from the current level, otherwise it returns 0.
<Condition>: is one of the following conditions: "<","<=","==",">",">=".
<Value>: is some integer number.
There can be intervening blanks between these tokens. A simple example of the use of RepeatUntil is shown below:
0 NextBatchItem
1 RepeatUntil 0 [NEXTLEVEL]==1
2 RepeatUntil 0 [FINISHBATCH]==1
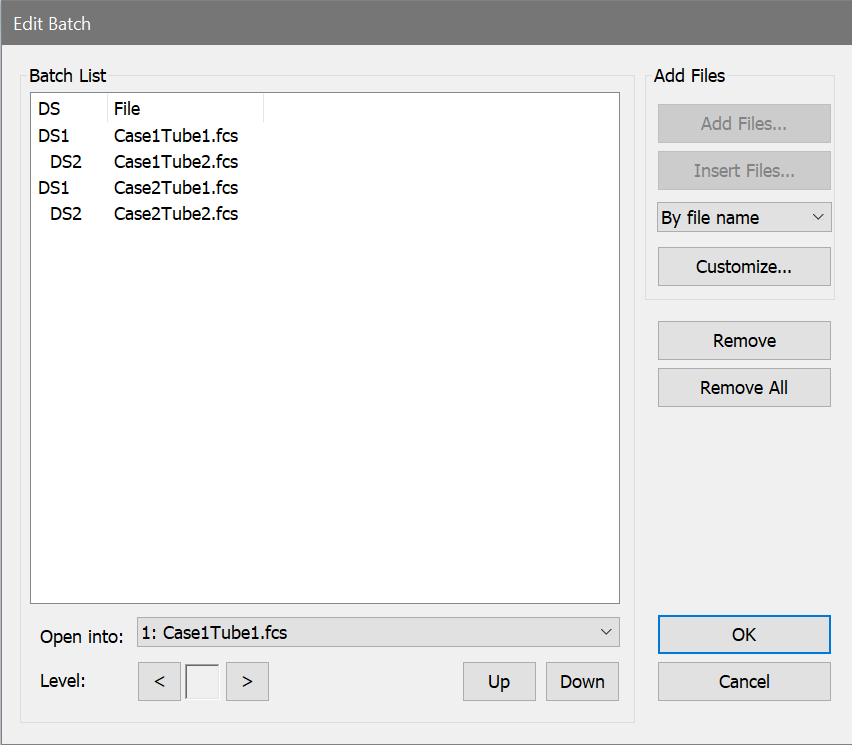
Suppose you have created a batch list that looks like:
When you run the macro it will open the first file, 1543303 and assign it to datasource #1. Since this first line is at level 1 (no indentation), when we get to the next line, RepeatUntil 0 [NEXTLEVEL]==1, the [NEXTLEVEL] finds the level of the next entry in the batch list which is 2. Since [NEXTLEVEL]==1 is false under that condition, the RepeatUntil loops to the designated line number (#0). The macro executes another NextBatchIndex and hits the RepeatUntil again. This time, however, [NEXTLEVEL]==1 is true and the macro drops down to the next macro line (RepeatUntil 0 [FINISHBATCH]==1). This line checks to see if we are done with the batch. In this case, we are not done so it jumps to macro line #0 again.
The pattern repeats until we are done with the batch. Keep in mind that you can create any number of levels in the batch list box so you can do some pretty complicated stuff automatically. We've created some fairly powerful examples of this looping capability. If you let us know you are interested in obtaining copies, we'll send them to you.
|
42 |
GetResourceFiles |
<Name> |
When played, instructs WinList to open the stored palette, regions, and gates. <Name> is any legal DOS filename excluding the "." and suffix. This command is automatically generated by the Save Protocol command.
|
43 |
ClearProtocol |
When played, instructs WinList to initialize the protocol. This is a dangerous command. It should only be used if you need to ensure that WinList is in a default starting condition. The Save Protocol command automatically generates this command.
|
44 |
SetProtocol |
<Version><maxRegions><maxGates><maxSpots><maxColors> <maxParams><dataPacketSize> |
When played, instructs WinList to set the protocol with the above specifications for the resources. This is a dangerous command. It should only be used if you need to ensure that WinList is in a default starting condition. The Save Protocol command automatically generates this command.
|
45 |
SetWindowName |
<Type>,<Name> |
When played, instructs WinList to set the <Type> window's name to <Name>. The current active window is the one edited. <Type> can be PROTOCOL, DATASOURCE, HISTOGRAM, RESULTS, or MULTIGRAPH. The <Name> field can be a name of the window or a keyword that when evaluated results in the name (e.g. [SAMPLE]).
|
46 |
ClearMultiGraph |
When played, instructs WinList to clear the contents of the current MultiGraph.
|
47 |
Echo |
<Status> |
When <Status> is set to OFF, histograms, results, and MultiGraphs will not be repainted on the screen. When <Status> is ON, the program automatically repaints all windows on the screen. This macro command is useful in speeding up macro playing especially if there are numerous events in each two parameter histogram. If you are inserting a Pause command within a dialog box, make sure the state of Echo is On; otherwise, you will not see the dialog box after the Pause executes.
|
48 |
GetNumberRegions |
<counter id> |
This command takes as its argument a number which identifies a counter id, and sets that counter to the number of regions in the active histogram. For example, if the active histogram has 4 regions in it, GetNumberRegions 5 will set user counter 5 equal to 4. It can be used for creating looping macros which loop depending on the number of regions in a histogram.
|
49 |
UpdateRemoteLinks |
This command has no arguments. When executed, this command will initiate the DDE scripts for all histogram and results windows which have remote connections set to update On Command. Scripts are executed in order of lowest data source-histogram window id to highest data source-histogram window id, then results windows from lowest id to highest.
|
50 |
ExecuteMacro |
<macro name> |
This command opens a macro file, <macro name> and runs the macro. It allows you to chain macros together. A macro which is opened and run with the ExecuteMacro command does not return to the macro from which it was executed. To use the command, select it from the Available Commands list in the Edit Macro dialog box, enter the macro name as its optional parameter, and append it to your macro. If you insert ExecuteMacro in the body of a macro, any macro lines following it will not be executed.
|
51 |
PositionRange |
rangeNum/type/lowBoundary/highBoundary |
This command can be used to reposition a region on a single parameter histogram. It positions one leg of a single parameter region in the lowest channel between lowBoundary and highBoundary.
rangeNum: Identifies the region. It must be a 1 parameter region. R1 corresponds to a rangeNum of 1.
type: Identifies whether the left side (0) or the right side (1) is being repositioned.
lowBoundary: Starting point for the search. The value is in units of percent of X-axis resolution. This allows the same command arguments to be used with listmode files of different resolution parameters.
highBoundary: Ending point for the search. The value is in units of percent of X-axis resolution. This allows the same command arguments to be used with listmode files of different resolution parameters.
|
52 |
Save Compensation File |
<file path name> |
|
53 |
Open Compensation File |
<file path name> |
|
54 |
Save Equation File |
<file path name> |
|
55 |
Open Equation File |
<file path name> |
|
56 |
Save Cluster File |
<file path name> |
|
57 |
Open Cluster File |
<file path name> |
Commands 52 through 57 allow compensation, calculated parameters, and cluster definitions to be saved to disk and opened from disk.
|
58 |
SetActiveObject |
type, id, name |
This command can be used to activate different objects. Presently, histogram and data source objects are the only supported values for type. The values for id and name represent the object's ID and name, shown in the titlebar. Once activated, you can send other commands and change object properties using the SetProperty and DoCommand commands below.
|
59 |
SetProperty |
property, type, value |
This command changes properties for the active object. Presently, histogram objects are the only supported objects. Determine the possible values for property by recording a macro that edits the properties of an object, and then looking at the SetProperty lines in the macro. Type and value should be determined in the same manner.
|
60 |
DoCommand |
command, option |
This command can instruct an object to do certain operations. Presently, histogram objects are the only supported objects. The object that receives the DoCommand should be activated with a SetActiveObject command prior to using DoCommand.
Histograms support two commands.
UpdateObject command has no option. It causes a histogram to update and redraw.
EditObject command can be used with no option to display the Edit Histogram dialog box, or it can be used in the form EditObject,Graphics to display the Edit Graphics dialog for the histogram. Note, there are no spaces in this form, just a comma to separate EditObject from Graphics.
|
61 |
reserved |
|
|
62 |
Open Names File |
<file path name> |
Command 62 opens files for the Names and Resolutions dialog box. When saving protocols, a names and resolutions file is automatically saved if you have used the Names and Resolutions dialog to edit parameter names or log decades.
|
63 |
Close Report |
|
This command closes the active report file. There are no arguments to the command.
|
64 |
Open Report |
<file path name> |
Command 64 opens the specified report file. When saving protocols, reports are automatically saved and a command is added to the protocol to open the report.
|
65 |
reserved |
|
|
66 |
Open Alerts |
<file path name> |
Command 66 opens the specified alerts file. This command is automatically generated when you save a protocol if you have created alert conditions.
|
67 |
reserved |
|
|
68 |
Open Acquisition Settings |
<file path name> |
Command 68 opens a file containing the settings in the Acquisition dialog for the Cytometer Plug-in-enabled version of WinList.
|
69 |
Set Color Mode |
<mode> |
This command selects a color display mode for the active data source. Currently support values for <mode> are listed below.
|
Value |
Meaning |
|
0 |
Color by Gate Color |
|
1 |
Color by Gate Combinations |
|
2 |
Color by Parameter Value |
|
3 |
Color by Gate Hierarchy |
|
70 |
Open Protocol |
<file path name> |
|
71 |
Save Protocol |
<file path name> |
Commands 70 through 71 allow protocols to be saved to disk and opened from disk.
|
72 |
Save Protocol Bundle |
<file path name> |
This command is used to save the current setup as a protocol bundle.
|
73 |
reserved |
|
|
74 |
Open Compensation Database |
<file path name> |
Command 74 opens a compensation database file for use by WinList's compensation database system.
|
75 |
Open Palette File |
<file path name> |
This command is used to open a palette file to set the colors used by gates.
Important Macro Tips
When editing macros, save the revised macro frequently under a new name and test the changes you make incrementally. It is much easier to debug your changes if you have only made a few at a time.
Use the Close All Windows menu option at the beginning of a macro if you want to be certain that the macro starts with a clean slate. Even if no other windows are open when you start recording the macro, you can still record the command to close all windows. When the macro is run, the command will be ignored if no other windows are open.
We suggest that when you are creating a complex macro you should break it up into logical sub-units. For example, record a macro that simply arranges the screen to your design specifications. Record another macro that sets up all the regions. When macros are in smaller sub-units, they become more manageable and easier to edit. You can use a word processor to concatenate all the macros together or you can use the multiple macro capability of Open Macro to run all the pieces at one time. The latter is probably the best choice because it gives you the most flexibility.
See also: